Background
When a Warranty Ticket has been created, the Contractor may need a Trade Partner to resolve the issue. Having your Trade Partners collaborate on the Ticket in SiteLine gives you a single source of truth and comprehensive record of the Warranty Ticket’s lifecycle.
Required User Permissions
Project Administrators, Project Editors, Facility Administrators, and Facility Editors can assign a Warranty Ticket to a Trade Partner.
Steps
- Navigate to the Warranty Tickets Module. You can do this from the facility homepage by clicking ‘View All’ under the Warranty Tickets section, or by clicking the wrench icon in the left-hand sidebar.
- Select the relevant ticket from the ticket list. You can also access your ticket via the link contained in the email notification you received when the ticket was created.

- Click anywhere on the row of the ticket you want to assign to open the ticket detail panel and the click on the "Assignments" tab on the right side of the panel.

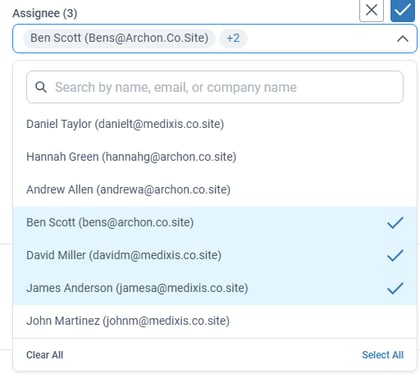
- Hover your mouse over the "Assigned To" field and ick on Edit to open the list. Use the search bar to find one or more assignees and click the checkbox confirm the selection
Additional Information
Update the status of the ticket to "Assigned".