![branding-blue-tagline.svg]](https://info.vueops.com/hubfs/Imported%20images/branding-blue-tagline.svg)
Step 1: Procedure Details
Start by providing the basic information about your procedure:
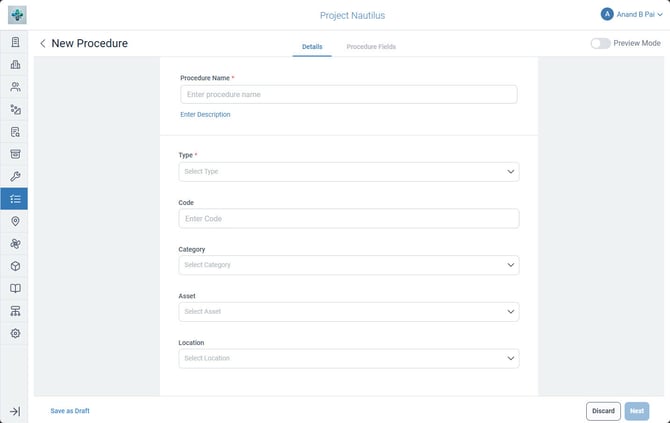
The Create Procedure form - Step 1: Details, where you define the procedure name, type, code, and category.
1. From the sidebar, select Procedures to open the Procedures module.
2. Click the Procedure button at the top-right of the page.
3. Fill in the procedure details:
- Procedure Name (required) - A descriptive name for the procedure (e.g., "Chiller MOP (Method of Procedure)").
- Description - A brief explanation of what this procedure covers.
- Type (required) - Select the procedure type (Preventive Maintenance, Audit, Compliance, etc.).
- Code - An optional reference code for the procedure.
- Category - Categorize the procedure for easier organization.
- Asset - Optionally link the procedure to a specific asset.
- Location - Optionally link the procedure to a specific location.
4. Click Next to proceed to the Procedure Fields step.
Step 2: Procedure Fields
In this step, you build the actual form by adding sections and fields. The page shows two action buttons:
-
+ Field - Add a new form field to the procedure.
-
+ Section - Add a new section to group fields logically.
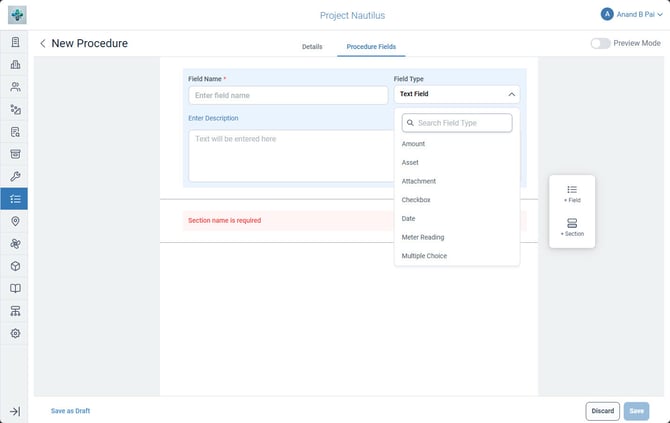
The Procedure Fields step showing the empty form builder with + Field and + Section buttons.
When you add a section, you provide:
- Section Name (required) - The title of the section (e.g., "Equipment Information", "Safety Checks").
- Description - Optional instructions or context for this section.
When you add a field, you configure:
-
Field Name (required) - The label for this field (e.g., "Serial Number", "Technician Name").
-
Field Type - The type of input (see Field Types below).
-
Description - Optional helper text explaining what to enter.
-
Mandatory - Toggle to make this field required for procedure completion.
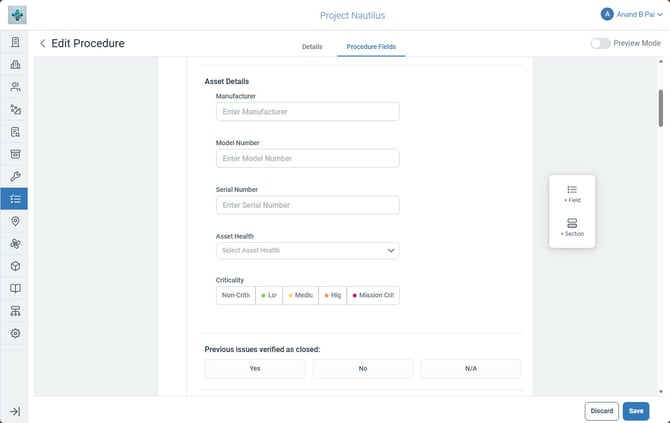
The procedure form builder showing a field and a section being configured with their respective properties.
Field Types
VueOps provides 12 field types to cover a wide range of data capture needs:
The Field Type dropdown showing all 12 available field types for procedure forms.
-
Text Field - Free-form text input for notes, names, serial numbers, descriptions, and other text data.
-
Number Field - Numeric input for measurements, quantities, readings, and other numerical values.
-
Amount - Currency/monetary values with decimal precision for cost entries and financial tracking.
-
Date - Date picker for recording when work was performed, inspection dates, or deadlines.
-
Checkbox - A toggle for boolean values, useful for simple confirmations (e.g., "Task completed").
-
Yes, No - A binary choice selection, ideal for verification questions (e.g., "All personnel briefed on MOP?").
-
Pass, Fail - A pass/fail status indicator for inspection checkpoints and quality checks.
-
Multiple Choice - Radio button or dropdown selection from predefined options (e.g., voltage levels: "208V", "460V", "480V").
-
Meter Reading - Specialized numeric input for recording equipment meter readings (runtime hours, pressure, temperature).
-
Signature - Digital signature capture for approval sign-offs, technician verification, and compliance documentation.
-
Asset - A linked reference to an asset in your facility, allowing technicians to associate specific equipment.
-
Attachment - File upload field for photos, documents, videos, or other evidence captured during the procedure.
💡 TIP: Choose field types carefully based on how you want data captured. Use "Yes, No" or "Pass, Fail" for quick checklist items. Use "Signature" for formal approval steps. Use "Attachment" when you need photo evidence of completed work.
Building an Effective Procedure
When building a procedure form, follow these best practices:
-
Start with a Section for each logical phase of the task (e.g., "Pre-Work Safety", "Execution", "Post-Work Verification").
-
Add Fields within each section for the specific data points to capture.
-
Use descriptive Field Names so technicians know exactly what to enter.
-
Add Description text to fields that need additional context or instructions.
-
Mark critical fields as Mandatory to ensure essential data is always captured.
-
Use "Pass, Fail" or "Yes, No" fields for safety checks that require explicit verification.
-
Include Signature fields at approval points and completion stages.
Save Options
When you're done building your procedure, you have two save options:
- Save as Draft - Save the procedure as a work-in-progress. Draft procedures are not available for attachment to work orders until published.
- Save - Save and publish the procedure, making it available for attachment to work orders and programs.
ℹ️ NOTE: You can also use Preview Mode (toggle at the top of the page) to see how the procedure will appear to technicians before saving.