Views Overview
VueOps Views allow users to save commonly accessed viewpoints within the Model Viewer. Views are created within a model or model set. There are two types of Views a user can create:
- User View - Private and hidden from other users
- Shared View - Available for all users in the facility to access
Views associate selected assets and viewer settings (e.g. slicing planes, object visibility) with the View so full context is retained. Views enhance communication between users around specific assets and locations in a facility model.
Create a View
1) Open a model or model set in the Model Viewer
2) Left-click the Views button ( item 1), located at the left-hand side of the screen on the VueOps Toolbar. The Views window appears to the right ( item 2)
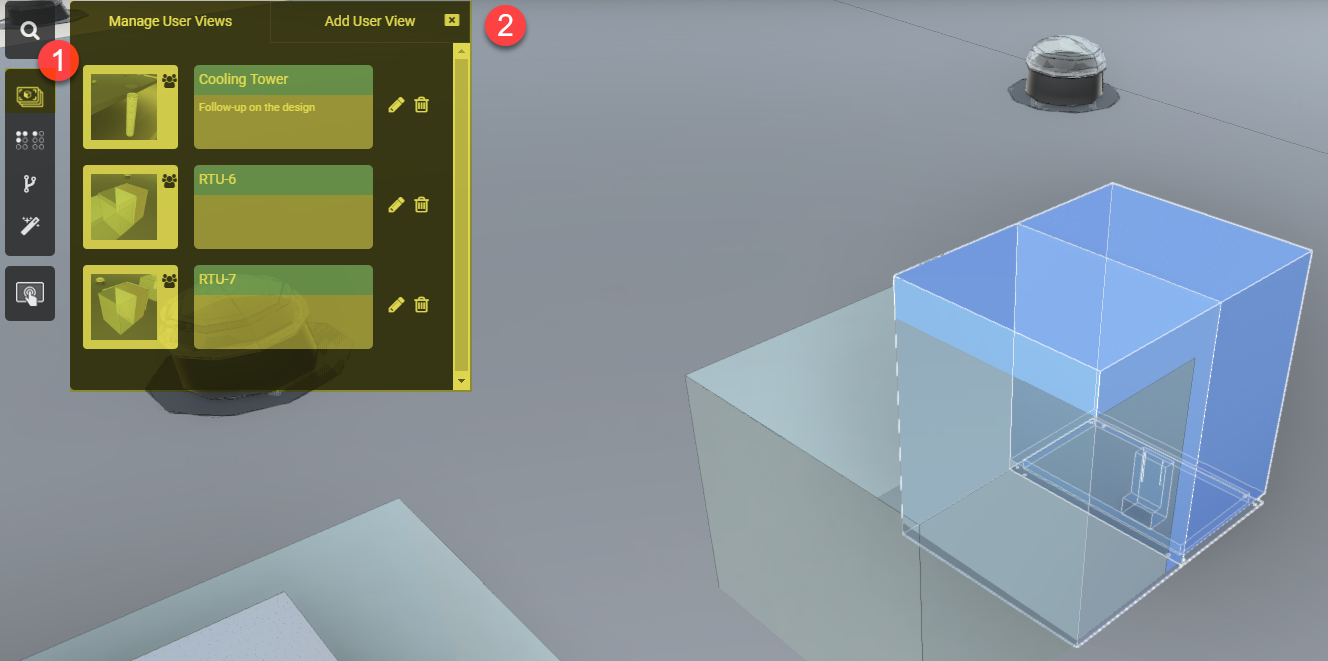
3) Navigate to the perspective in the model you would like to create a View for. Either manually navigate to a viewpoint of interest in the Model Viewer or use VueOps Search to navigate to an asset. To navigate manually, position the viewer perspective by orbiting, panning, and zooming and apply any section planes to frame the view the way in which you would like to save it in the VueOps View.
4) Left-click the " Add User View" tab of the Views window and enter the following View information:
4a) Name (required): Name of the View. The name will appear next to the View in the "Manage User Views" tab.
4b) Description (optional): A short description about the view and anything else you want to communicate about the View. The description will also appear in the View details in the "Manage User Views" tab.
4c) Tags (optional): Enter the tag number of assets you would like to the View to be associated with. After the View has been created, the View will appear in the Insights panel when the tagged asset is selected.
4d) Shared (optional): Check this box to share the View with other users who have access to the VueOps facility.
4e) Markup (optional): Toggle the selection to apply markups to the user view.
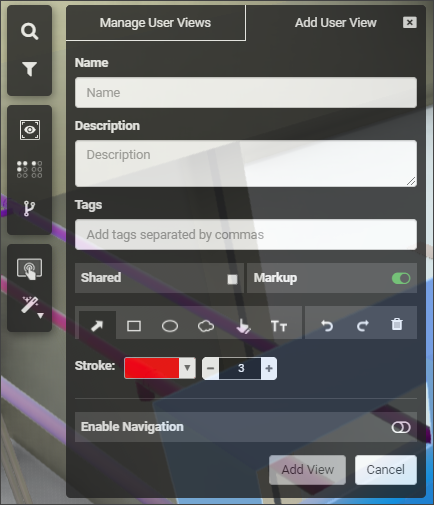
5) After the information above has been entered, left-click the " Add View" button to save the View.
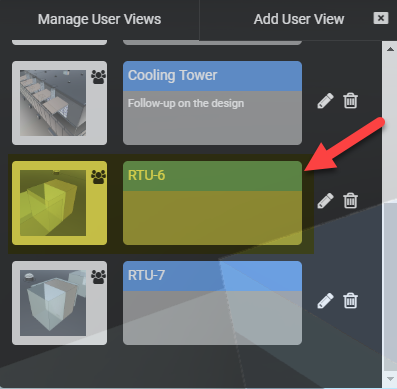
6) The saved View will be displayed in the " Manage User Views" tab.
Questions?
Reach out to support@vueops.com for software related questions.