Markups Overview
 to control the visibility (hide/unhide) of the markups.
Create Markups
|
|
Square |
|
|
Polygon |
|
|
Circle
|
|
|
Cloud
|
|
|
Line
|
|
|
Polyline
|
|
|
Arrow
|
|
|
Text
|
|
|
Callout
|
|
|
Highlight
|
|
|
Freehand Highlight
|
|
|
Freehand Draw
|
Select Markups
 to multi-select the markups.
- Click on the tool and drag over the markups you would like to select.
- Alternatively, you can also use your keyboard controls to multi-select markups. Select a markup and hold CTRL on your keyboard to select multiple markup
Edit Markups
VueOps allows you to adjust the size and orientation of the markup or change the style of the markup
Change Size
- Select the markup
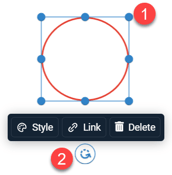
- Use the handles (1) to adjust the size or use the orientation button (2) to adjust the orientation of the markup
Change Style
-
Select the markup
-
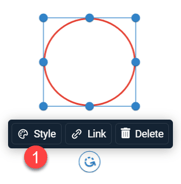
Click on Style (1).
-
From the style menu, you can change the color (4), opacity (5), and width (6) of the text (1), outline (2) and fill (3).

Delete Markups
VueOps allows you to delete your markup. You can either delete the markup by selecting the markup and choosing the Delete (1) option from the toolbar or use your keyboard Delete key to delete the selected markups

Publish Markups
VueOps allows you to publish the markups to the entire team using "Layers". By default, all the markups are saved under the “My markups” layer that is visible only to the author. If you wish you can select one or more markups, assign them to a layer and publish it to the entire team.
Layers
You can organize your markups and publish them to the entire team using layers. Layers can be created on two levels. Once markups are published to the layers, users can use them to control the visibility of the markups.
Create Layer
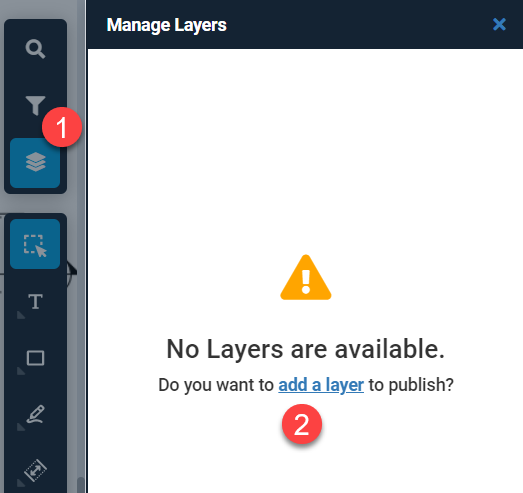
- Select the "Layers" Icon (1)
- If no layer exist you can click "add a layer" (2) to create a new one
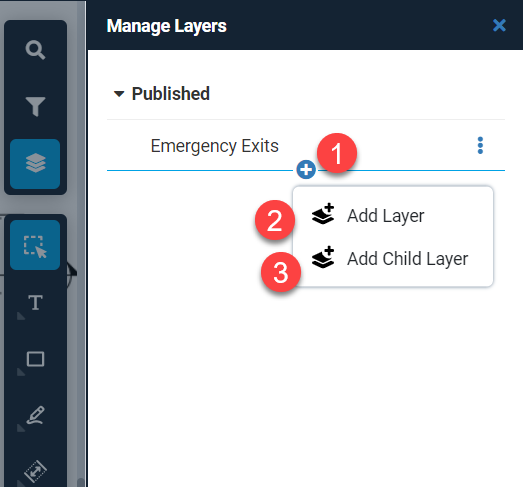
- If you already have layers hover over them, click "Plus" icon (1) and select “Add Layer” (2) or “Add Child Layer” (3)
"Add layer" will create the layer on the same level and "Add child layer" will create a layer underneath the parent layer.
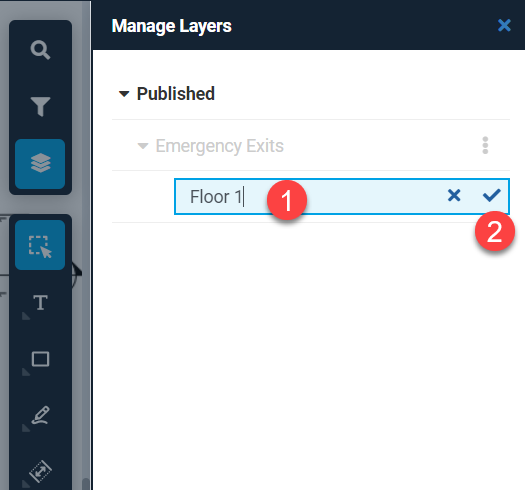
- Give a name to the layer (2)
- Select "Ok" icon (2)
Rename Layer
- Select the "Layers" Icon (1)
- Click on the "Menu" icon (2) next to the layer you want to rename
- Click "Rename" (3)

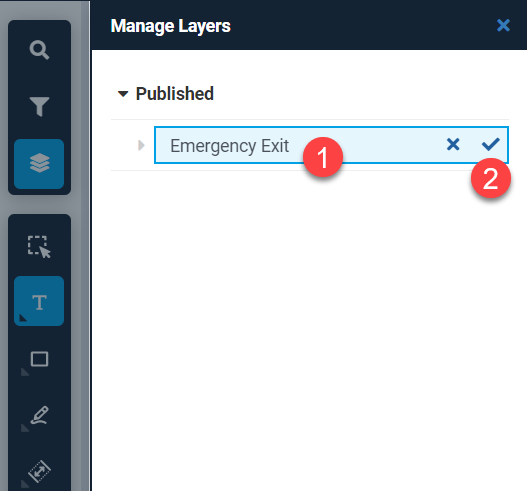
- Enter the new name (1)
- Click "Ok" icon (2)
Delete Layer
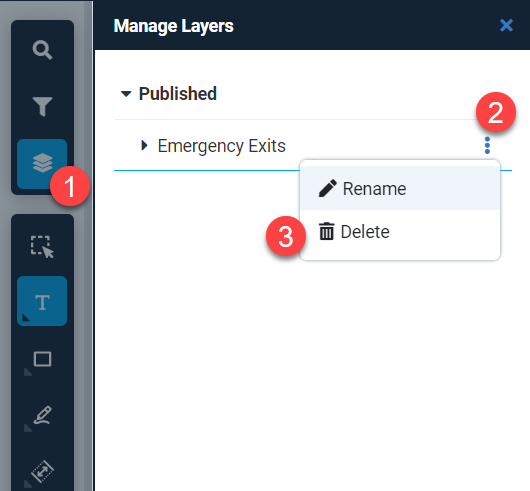
- Select the "Layers" Icon (1)
- Click on the "Menu" icon (2) next to the layer you want to delete
- Click "Delete" (3)
If you are deleting a layer that has markups, you can either delete the layer with the markups or move the markups to the “My markups” layer and delete the layer only. “My markups” are personal markups that are visible only to you.

Publish
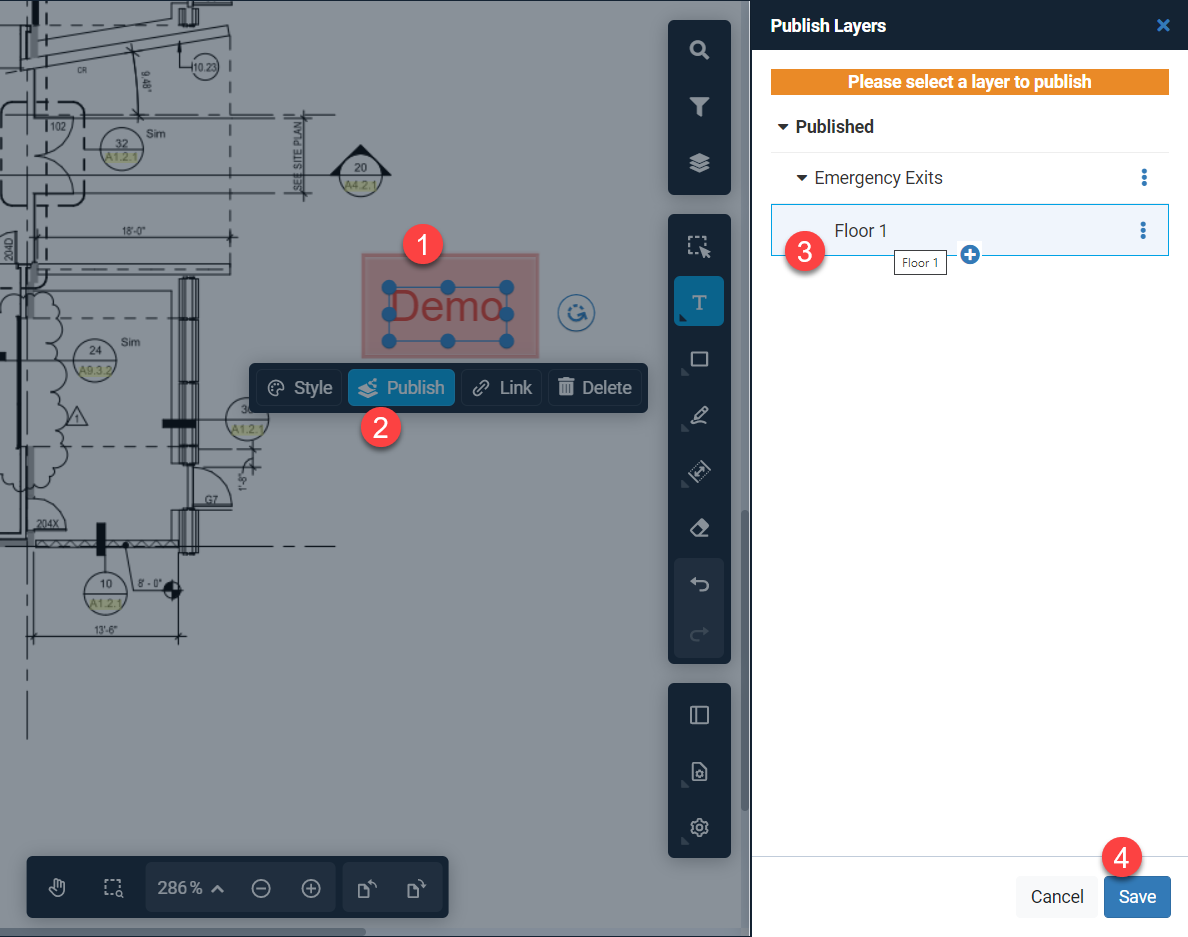
- Select one or more markups (1)
- Click “Publish” (2)
- Choose a layer (3) to publish the markup. If layers don’t exist, add a layer to publish
- Click “Save” (4)
Unpublish
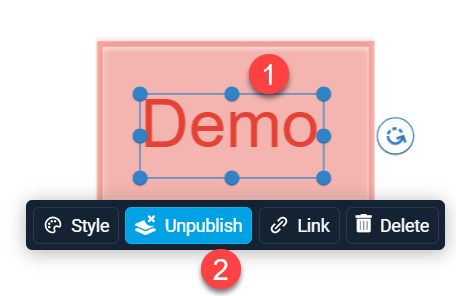
- Select one or more markups (1) that are published
- Click “Unpublish” (2)
- Confirm "Unpublish" (1) from the pop up

Unpublished markups will be save under your personal markups (i.e) "My Markups" layers. Personal markups that are visible only to you