
Upload folder
- Open VueOps Drive (from the Documents module)
- Click the "Add" button in the upper-right corner
- Click on "Upload Folder"
- Choose the folder that you want to upload and click on "Upload"
Only one folder can be uploaded at a time, but subfolders will be uploaded automatically
Upload file(s)
- Open VueOps Drive
- Click the "Add" button in the upper-right corner
- Click on "Upload Files"
- Choose the file(s) that you want to upload. For uploading multiple files, hold the Command or Control key (Mac or Windows, respectively) while selecting files and click on "Upload"
If a file with the same name is uploaded, VueOps Drive will upload the file as a version of the file already in VueOps Drive. Click here to learn more about file versioning.
File Upload Progress Bar will display at the bottom of the screen to track the status of uploading file(s)
 File uploaded
 Error
Error
File Versioning
Anytime a new version of a document is uploaded to VueOps Drive, the old version will be overwritten by the updated version. There is no need to rename the file. The version of the file will be reflected in the "v" next to the file name

To access the File version history, click on the file name and open "Versions" tab on the right side window
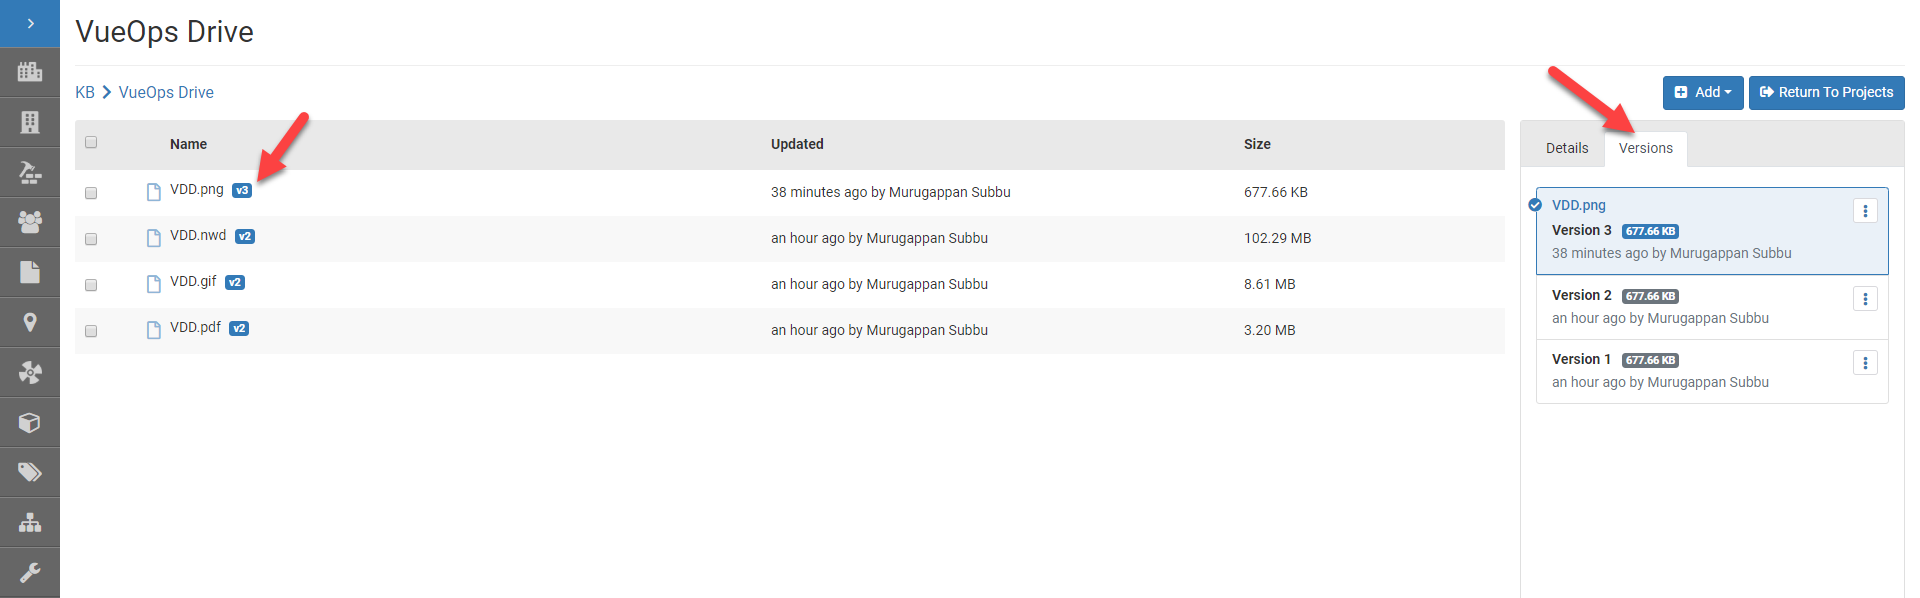
VueOps drive keeps track of the latest 30 versions
Click here to learn how to download previous versions of a file